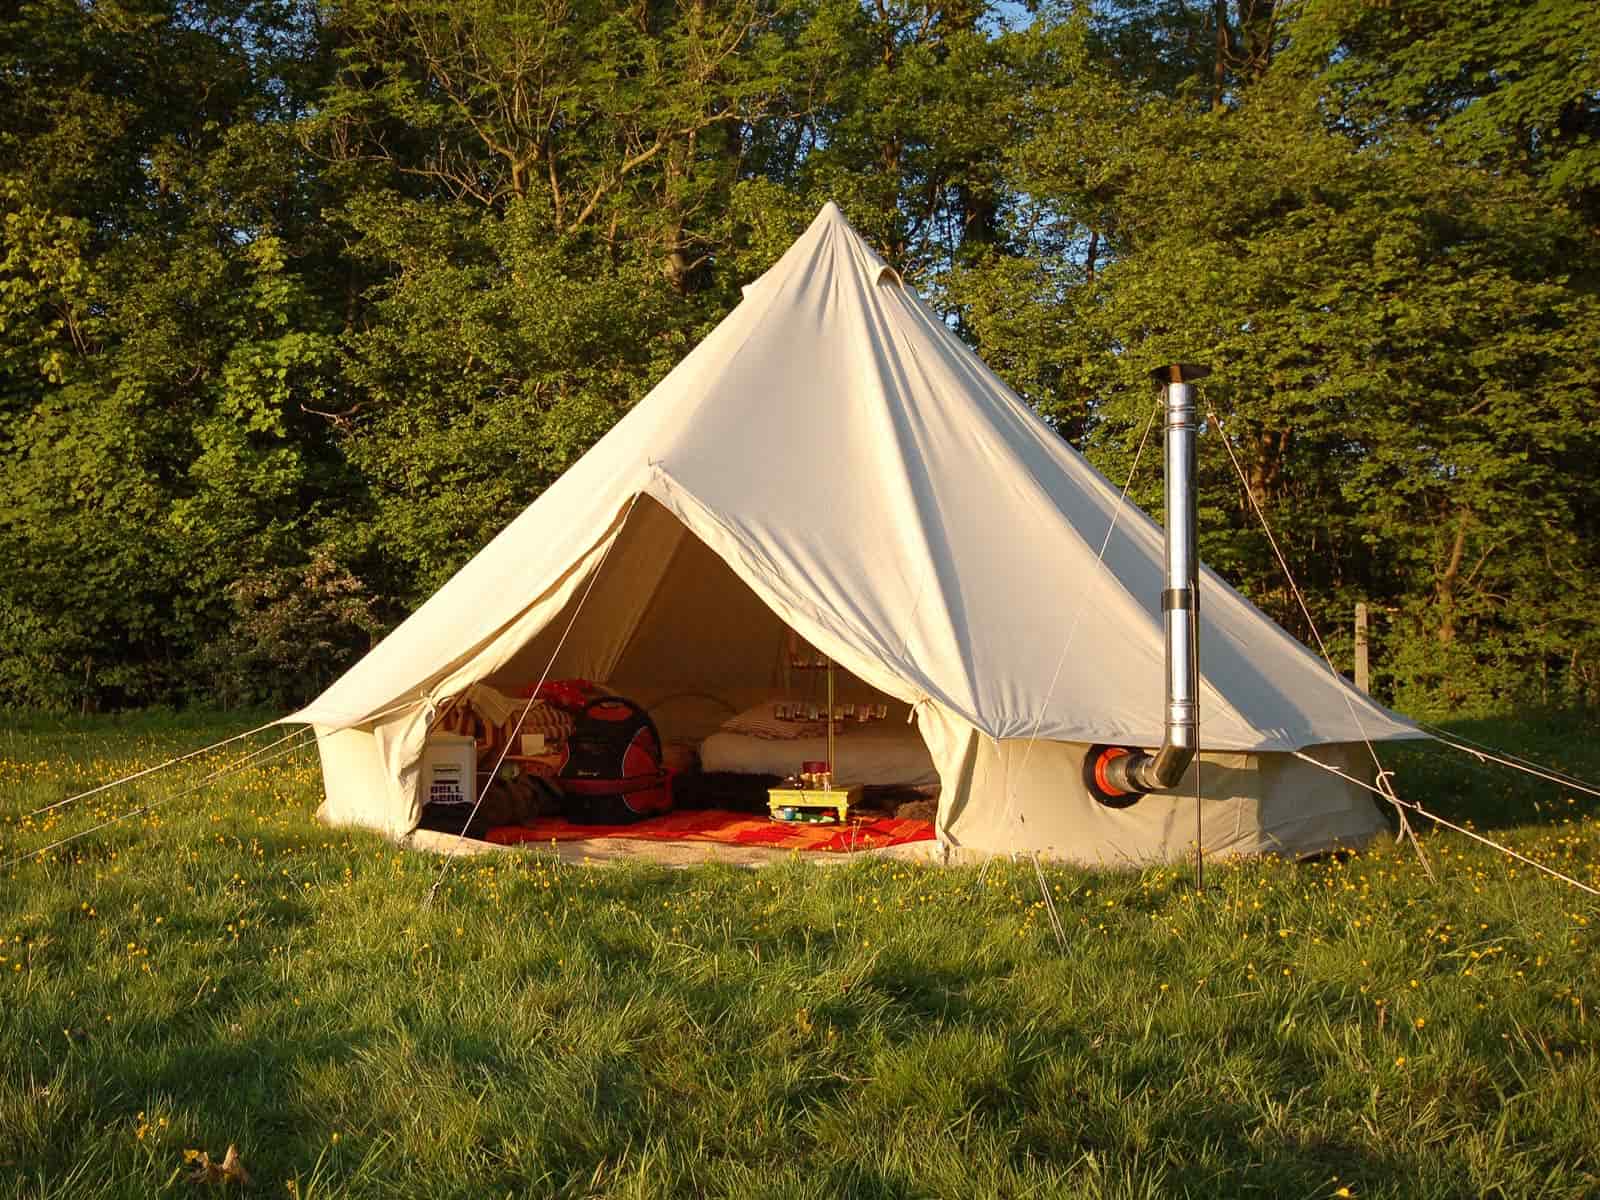
Installing a Flashing Kit / Stove Hole in your Bell Tent.
Here at Bell Tent UK, we don’t supply any of our tents with the flue hole already fitted as it’s a personal preference where you want to place your flashing kit based on:
- Stove type and height
- What part of the stove the flue comes out from (top or back)
- Diameter of the chimney/flue pipe
- Size and design of the tent
- Where you want it positioned
We also feel that many of the flat pre-fitted flashings out there are not fit for purpose and therefore dangerous.
But don’t worry, it’s a really easy one-off job fitting a flashing kit and creating a “Stove Hole” and it only takes around 15 mins to do so!
You will need the following tools:
- 1 x pair of sharp fabric scissors (zig-zag pinking shears are ideal but not vital)
- 1 x “spike” for the bolt holes or you can use the end of one of the scissor blades if you’re careful
- 1 x spanner and/or pliers to undo and tighten the bolts
- 1 x ruler or tape measure to work out the diameter of your flue
- 1 x pen
1. Dismantle your flashing kit.

Using your spanner or pliers, undo the bolts so you end up with these separate elements:
- 2 x metal rings
- 1 x vulcanised rubber flashing
- Nuts and bolts
2. Trim the flashing to the size of your flue.

Grab a section of your flue/chimney pipe and measure its diameter. The vulcanised rubber flashing has ribs on it showing the diameter of each ring.
N.B: Always cut off slightly less than you think to start with as you can always cut a bit more off, but you can’t put it back if you remove too much! The rubber is also slightly stretchy so will accommodate a slightly larger flue than the hole. You want a good tight seal rather than a flashing that slides up and down your flue pipe.
3. Where do you want to place your stove?

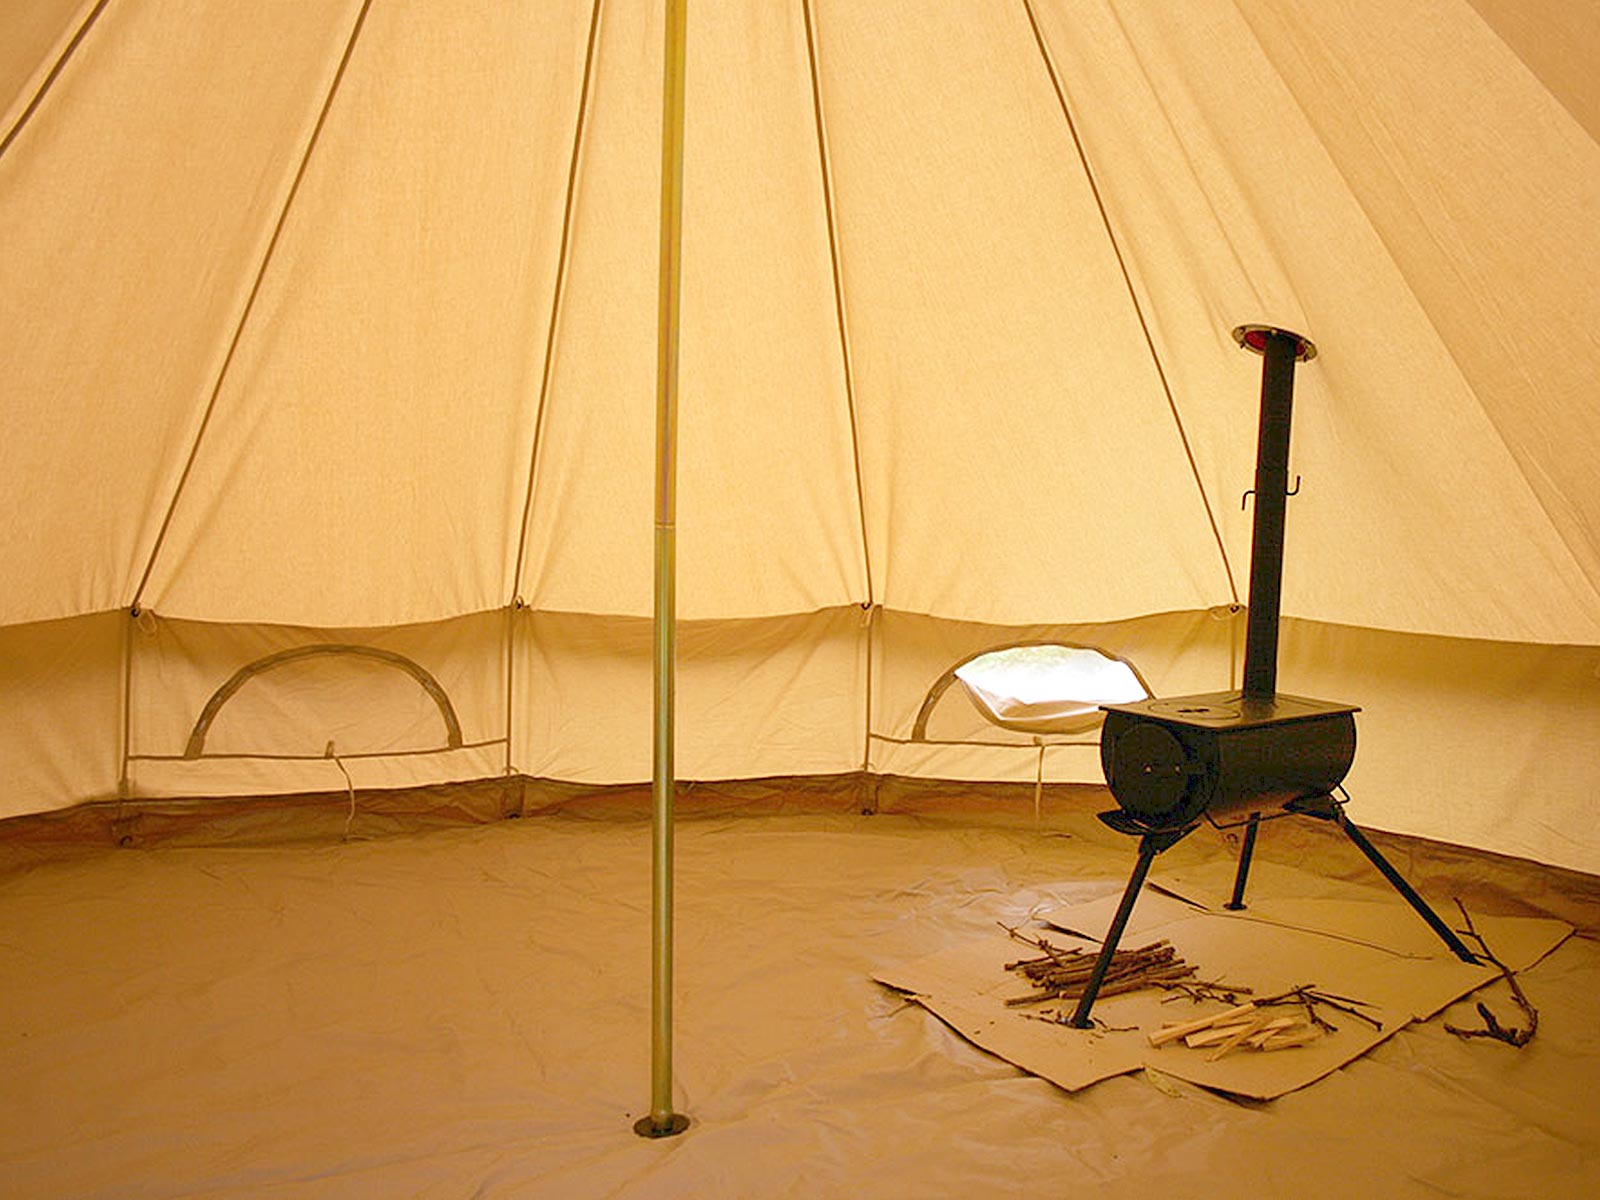
Firstly, look at your stove and see if the flue pipe comes out of the top or back of it as this will have a large effect on where you place it and where you need to cut a stove hole. Some stoves have flues that come out of the back of the stove box so they will either need to go through the wall of the tent or have a 90-degree bend in the chimney so it can go out of the roof.
It’s really worth pitching your tent, assembling your stove, and placing some of the flue/chimney sections in place so you can try out different positions before committing to one. (Obviously un-lit!!)

We recommend the best spots are 2 roof panels in from the tent door but that’s up to you. Most people like their sleeping area to be at the back of the tent and being close to the door could be an advantage if you need to flick some embers out.
You want it to be at least 75cm from either the wall or centre pole. Too close to the pole affects the rigidity of the whole tent. Too close to the wall, the top of the stove will be too near the tent roof to be safe, and any cooking will result in a dirty roof. It’s also worth noting that heat radiates 360 degrees from its source so too far into the corner means you are wasting some of it heating the outside of the tent.
Once you have your spot make sure the flashing kit will sit in the middle of that roof panel and not cross a seam.
4. Trace the flashing kit.

Using one of the metal rings as a template, draw around the inside of the ring and make a dot in the middle of each bolt hole.
5. Time to cut the canvas.

Now it’s commitment time!! Cut the circle out and make a small hole for each bolt to go through.
6. Bolt it all together.

This is the point where there are two different views in the industry or the best order to do this. One of our stove suppliers thinks the rubber should be on the outside with one metal disk above it and only the other metal disk on the inside of the tent. This seems to work ok as the bottom of the flashing it textured to grip the canvas and once bolted tight the hydrostatic pressure is high enough to stop water from getting in. After years of doing this, we recommend you do it another way with the flashing base on the inside of the tent and the “nipple” protruding through the roof. This way you only have one metal ring on the outside, the flashing coming through the tent and the other metal ring below this.
The benefits of this way are:- It's safer as the rubber stops the hot flue from touching any of the roof canvas..
- It provides better insulation of the roof from the hot flue should the flue end up pushing to one side in the wind
- It’s more rain resistant as there is no edge of the flashing on the outside of the tent for the water to get under
Bingo you’re done!! We hope you enjoy many a toastie night in your tent.
Other tips worth considering:
Always have a means of putting a fire out ready and to hand! We recommend a small powder filled fire extinguisher like the ones you get for cars. The powder is much easier to clean up than liquid, which will permanently stain any canvas it touches. We cable tie its holder to the bottom of an A-frame leg so you always know where it is.
It’s a good idea to “proof your stove” before using it inside of the tent. This means setting it up outside the tent and doing one full-power burn cycle. This will set the heatproof paint on the stove and stop you from dealing with any of the toxic fumes released in this first burn.
Always burn dry wood to avoid sparks making it all the way up the flue and then landing on your pride and joys roof either making it or worse case holing it.
Regularly check the inside of your flue for soot build-up and clean it out. This usually only becomes an issue on long term pitches but its good practice to be aware of it and to keep an eye.
Other Stove FAQs.Q. Can you put a stove in a Bell Tent?

A. Yes, you can. Any size or design of Bell Tent should be able to accommodate some kind of stove. Do some research to make sure you get the right stove for your Bell Tent as an 8kw monster is going to be way too much for any tent under 5m. If you have our smallest 3m size tent, please be aware you will need to find a mini stove as a regular-sized stove will be too big to fit comfortably.
Q. Can I put a Stove Jack in any tent?
A. As a general rule you can put a Stove Jack or Flashing in any canvas tent as long as you stick to some general safety guidelines. Things like selecting the right power of stove for the size of your tent. Making sure there is enough space around and above the stove so it can burn safely without heating up its surroundings. A lot more caution needs to be exercised when putting Stove Holes or flashings in a non-canvas tent as nylon or polyester and way more flammable and susceptible to melting. They also don’t support the weight of the flashing in the same way as thicker canvas and may therefore rip.
Q. Are Bell Tents Fireproof?
A. All tents sold in Europe and the UK should have a fire rating which indicates their fire retardancy level. Bell Tent UK’s tents conform to BS 5852 which is also known as the cigarette test and means the canvas will stop burning if the propellant is removed. Some tents claim to be Fireproof but it would be safer to say Fire Retardant as Fireproof means totally Fireproof and very few things in the world are that. You can also treat your tent with a fireproofing liquid like Flamebar but any treatment will eventually get washed off by the weather so you’ll need to repeat the process often to get the desired protection. Regardless of this the best thing to do is always make sure you have a way of putting out any fire to hand and not to leave a fire unattended.
Q. Do Bell Tents get hot?
A. Yes, they can get really hot in any weather conditions and it’s easy to keep them toastie with a stove or even a tea light chandelier. The upturned cone design or “Bell” shape of a Bell Tent means there is less air to heat up as you go further up the centre. This makes the tent much easier to warm up and keep hot than a box shape. The main factors will be the KW (heat output) of your stove, what you’re burning and the size of your tent.
Q. Where does the stove go in a Bell Tent?
A. This depends on the size and design of the Bell Tent and the design of the stove. Most people want their stove to be to one side of the door and coming through the roof halfway between the wall and centre pole. This means you benefit from the heat radiating 360 degrees from both the stove and flue pipe within the tent and maximises the benefit.

Q. How do you heat a Bell Tent?
A. There are several ways to heat a Bell Tent. The obvious one is to add a stove using a Stove Jack, Stove Hole or Flashing. Another is to fit a tea light chandelier as you will be surprised how much heat 21 tea lights put out. Can you get mains power to your tent? If so, why not add an electric portable oil-filled radiator? We chain them to the centre pole so they can’t fall over, and the heat radiates from the middle of the tent.
Q. Can you cook inside a Bell Tent?
A. Yes you can but be aware that you want to be away from the canvas to avoid it getting marked when having a big fry up. You will also need to do it from a sitting or kneeling position if you have a smaller size bell tent.
Q. What is a tent flashing kit?
A. Also known as a Stove Jack or Stove Hole a flashing kit is a heat resistant vulcanised rubber hole that allows the chimney or flue pipe to safely pass through a roof and let the smoke and fumes from a stove escape into the sky.
